There are minor differences in the layout between the two applications, however the information and which step you put the information in should be very similar.
-
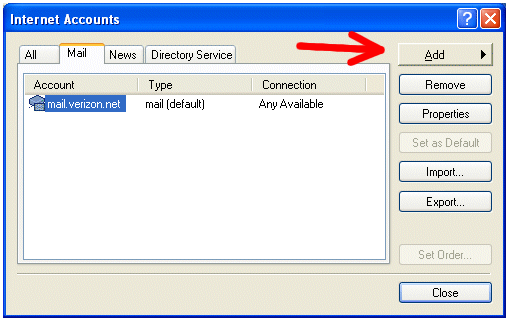
- Start Outlook Express, and on the Tools menu, click Accounts.
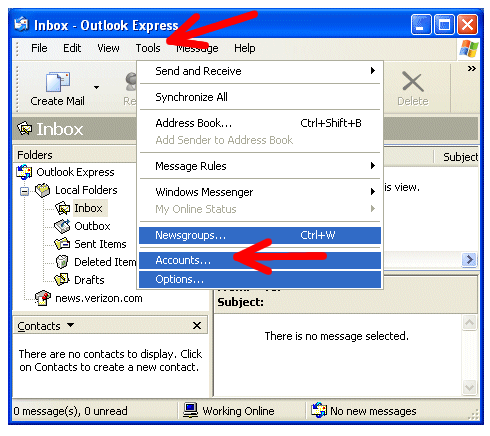
NOTE: If the Internet Connection Wizard starts up automatically, skip ahead to step 3. - Click Add, and then click Mail to open the Internet Accounts Wizard:
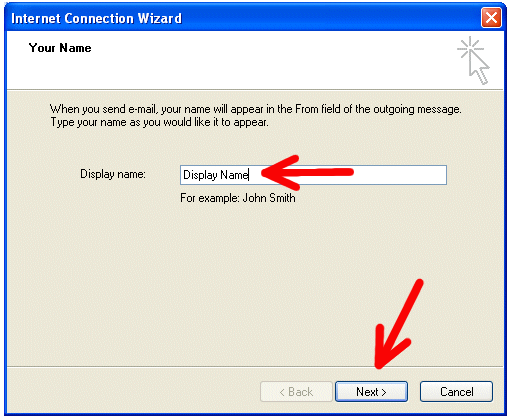
- On the Your Name page of the wizard, type your name as you want it to appear to everyone who gets e-mail from you, and then click Next.Most people use their full name, but you can use any name-even a nickname-that people will recognize:
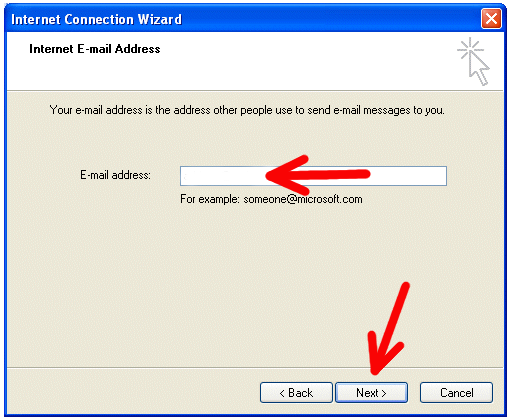
- On the Internet E-mail Address page, type your e-mail address, and then click Next:
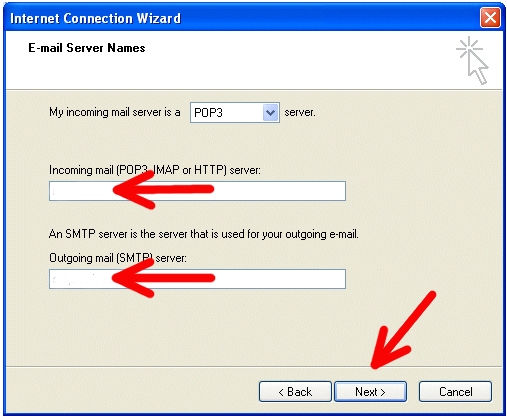
- On the E-mail Server Names page, you will be using a POP3 account:
- The Incoming mail server will be: mail.vcn.bc.ca
- The Outgoing SMTP server will be: out.vcn.bc.ca
- NOTE: If you wish to use Telus or Shaw as your internet provider, please go to your provider’s website and follow their Outgoing Server settings.
- NOTE: Using the Outgoing Mail Server ‘out.vcn.bc.ca’ first requires registering for access HERE.
- On the Internet Mail Logon page, type your account name and password.
- Click Next, and then click Finish.
- Start Outlook Express, and on the Tools menu, click Accounts.
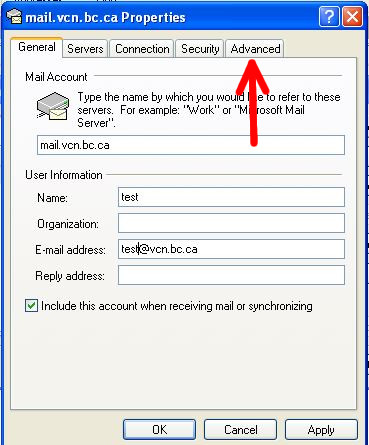
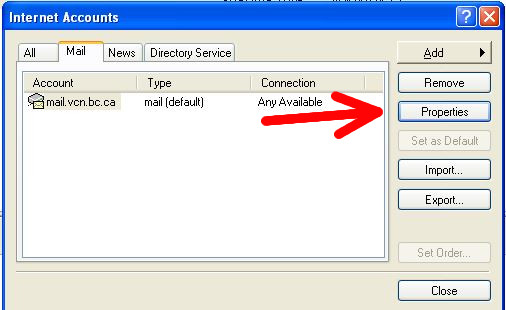
8. Now we need to reconfigure Incoming/Outgoing server settings. From the Tools menu, click Accounts and press on Properties button:
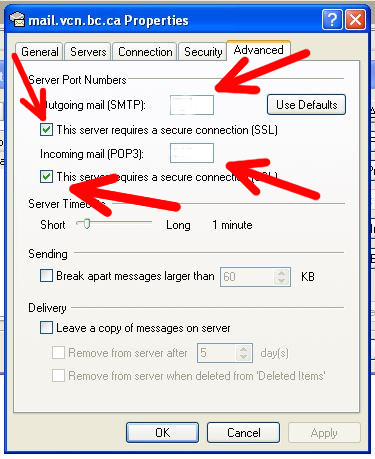
10. Change Incoming/Outgoing server settings as following:
-
- Incoming settings:
Incoming mail: 110
Check “The server requires a secure connection (SSL)” check-box - Outgoing settings:
Outgoing mail (SMTP): 587
Check “The server requires a secure connection (SSL)” check-box
- Incoming settings:
11. Press on OK button.

