- Start by opening Microsoft outlook 2016. If you don’t know how to do this, do one of the following:
- 1.1 if you are using a Windows 7 computer, click the start button normally located on the left-hand side of the bottom of the screen. This will display the Windows start menu. Type the words Outlook 2016 in the search box and hit the return key. Alternately, you can click on the program’s icon if you see it displayed on your screen.
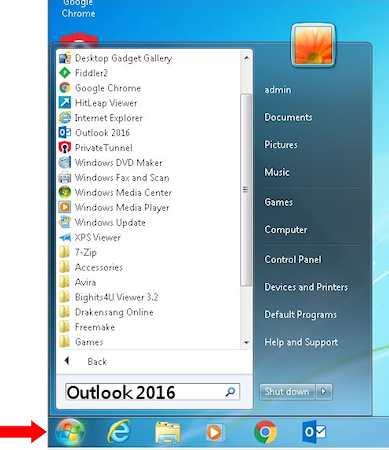
- 1.2 Press the Windows key on the keyboard and the Q at the same time. This will bring up a search box where you can type in the words Outlook 2016.
- 1.3 If the keyboard does not have a Windows key, press the key marked CTRL and the key marked ESC at the same time. This will display the start menu. Look for the magnifying glass icon in the upper right-hand corner, and click it.This will bring up a search box where you can type in the words Outlook 2016
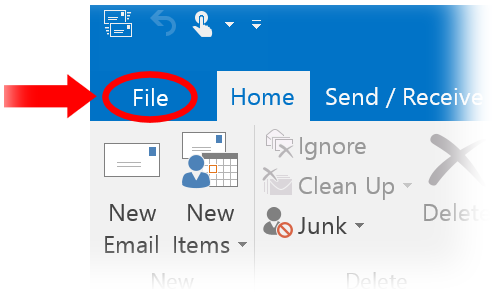
2. The main Outlook 2016 window will open, and in the upper left-hand corner a menu called “File”, click it to proceed (Note: If this is the first time you run the program, for example if this is a new computer you may skip to step 4.)
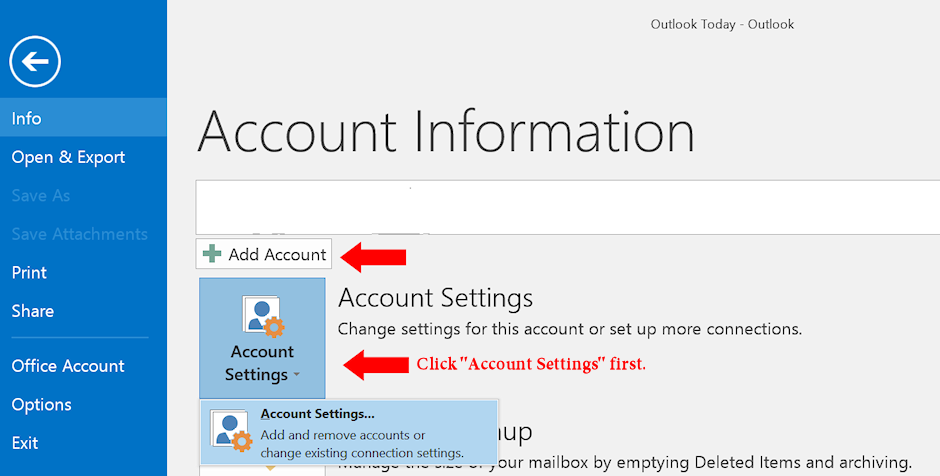
3. The Account Information window will open. First click the large Account Settings button, and then click the smaller Add Account button which appears.
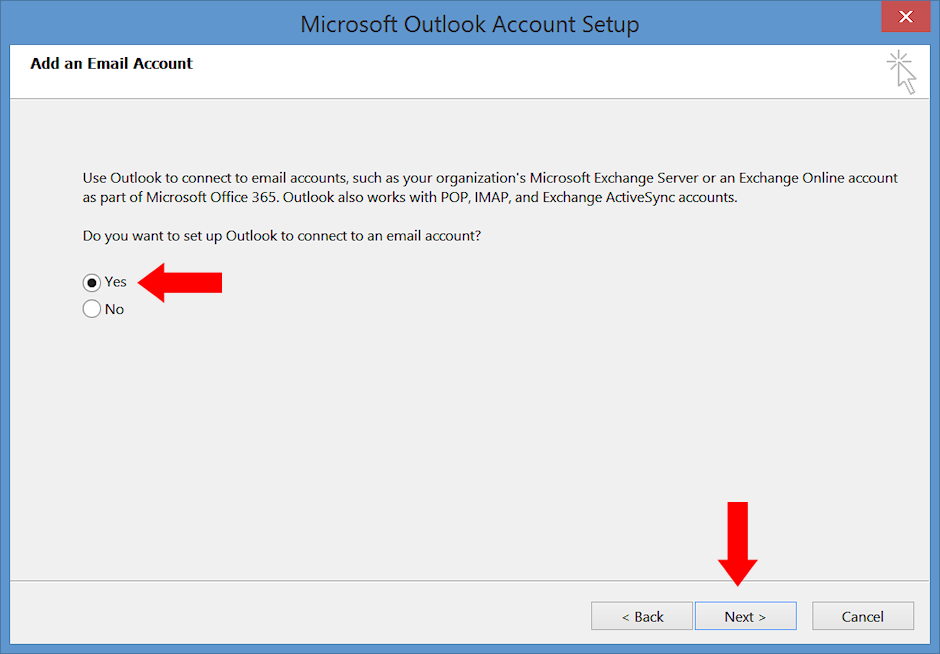
4. In the Add an Email Account window, first click “Yes”, and then the button marked Next.
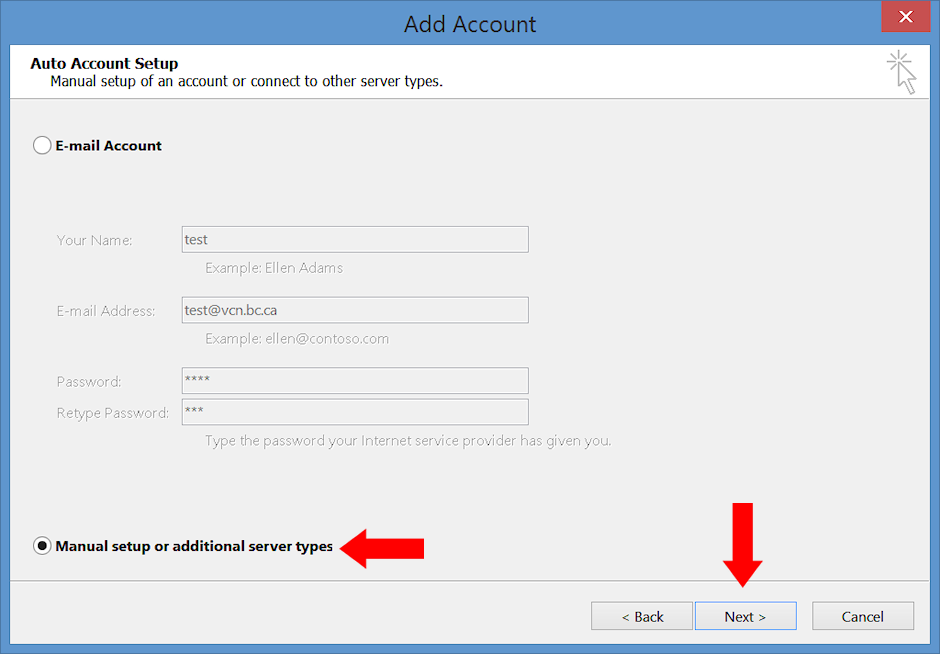
5. In the Auto Account Setup window click on the option marked “Manual set up or additional server types.” Then click the button marked Next.
6. in the Choose Service window select the option marked “POP or IMAP“, and then the button marked Next

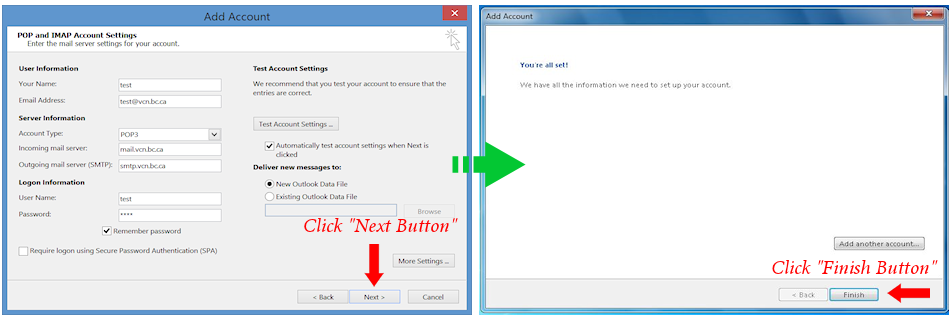
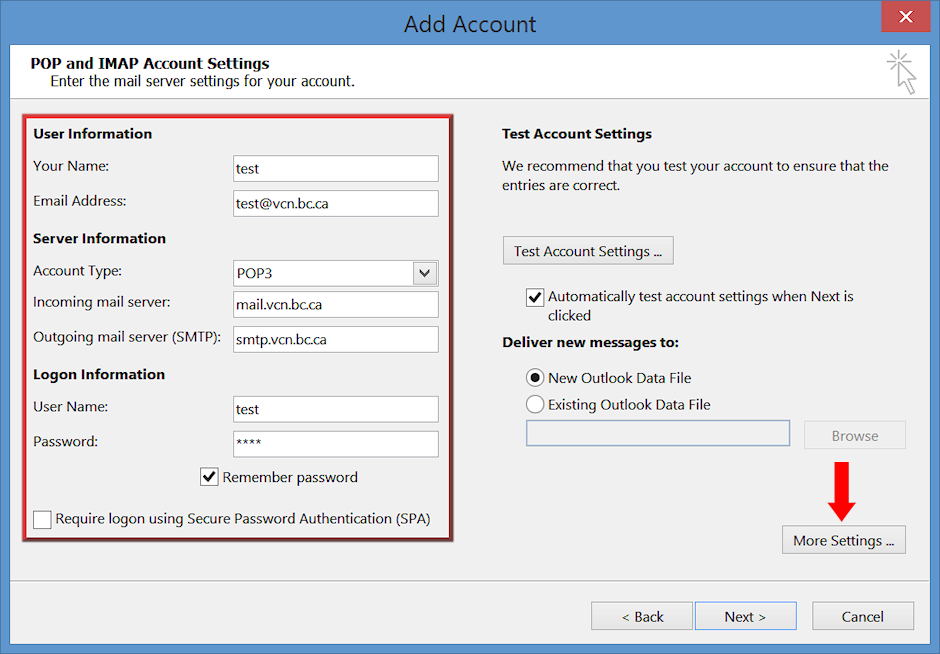
7. The POP or IMAP Settings window has five major sections and one checkbox (User Information, Server Information, Login Information, Remember Password, and Log on Using Secure Password Authentication (SPA)), here’s what you put in each, in order:
Your Name. Normally, people enter their name in this box, but it can be anything you like. People receiving your email will see this text usually the top of the message right after the word “From:”
E-mail address. Put your full VCN email address here.
Account type. This should automatically be sent to “POP3”. If it is not, click the small arrow icon immediately to the right of this box and select it from the list.
Incoming Mail Server. Enter mail.vcn.bc.ca in this box.
Outgoing mail server. There are two options for this box depending on how you use VCN,
- 7.1 if you connect to VCN only via a dial-up modem then enter mail.vcn,bc.ca , OR
- 7.2 if you have a high-speed Internet connection in addition to your VCN account on the same computer and have signed up for the “VCN outbound mail service“, enter
out.vcn.bc.ca
Preregistration is required for the service and is most useful if you’ve been having problems sending your VCN mail since getting your high-speed account. [See the link for more information.]
User Name. Enter the first part of your email address here. Just omit the “@vcn.bc.ca”. For example, if the complete no address was “[email protected], you would just enter test.
Password. Enter your VCN password here.
Remember password. Put a check in this box.
Just below the Remember Password tick box, there is another tick box with the phrase “Log on Using Secure Password Authentication (SPA)”. Leave this box empty.
Now, click the “More Settings…” button
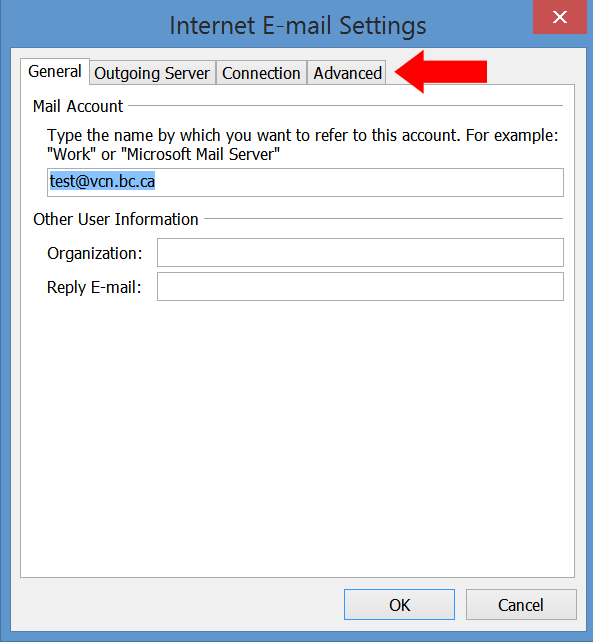
8. Now, in the Internet Email Settings Window, click the Advanced tab.
9. There are two options for this box depending on how you use VCN,
FOR DIAL-UP MODEM USERS:
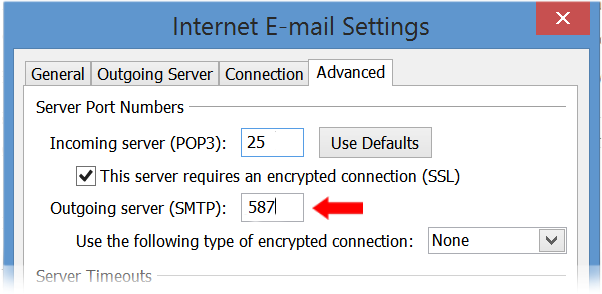
- 9.1 If you connect to VCN only via a dial-up modem then enter
- The Incoming Server (pop 3)” should be 25
- Make sure there is a tick mark in the box next to “This Server Requires an Encrypted Connection (SSL)“
- The Outgoing server (SMTP) should be 587
- The “Use the following type of encrypted connection” should be set to None.
- Go to step 10.
FOR HIGH-SPEED INTERNET CONNECTION USERS:
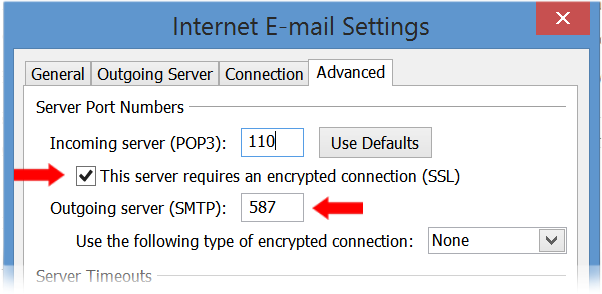
- 9.2 if you have a high-speed Internet connection in addition to your VCN account on the same computer and have signed up for the “VCN outbound mail service“, enter
- The Incoming Server (pop 3)” should be 110
- Make sure there is a tick mark in the box next to “This Server Requires an Encrypted Connection (SSL)“
- The Outgoing server (SMTP) should be 587
- The “Use the following type of encrypted connection” should be set to None.
10. Click the OK Button at the bottom of the window. This will take you back to the POP or IMAP Settings window and click the Next Button at the bottom. To complete the process, click the Finish Button on the congratulations screen.