
1. Login to your Gmail account
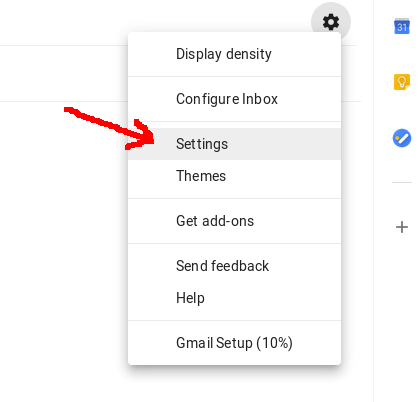
2. Click on the gear icon near the upper right corner

3. Click on Settings
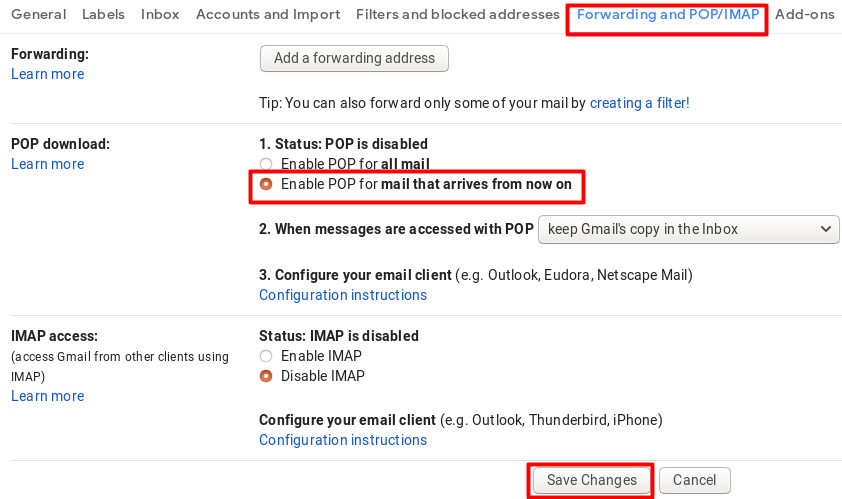
4. Select the ‘Forwarding and POP/IMAP’ tab. Under ‘POP Download’, select ‘Enable POP for mail that arrives from now on’. Click ‘Save Changes’ when finished.
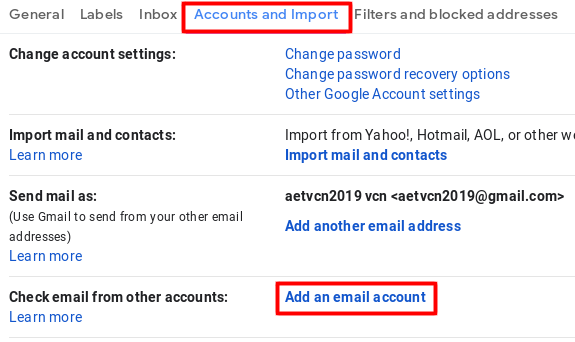
5. Go back to Settings. Select the ‘Accounts and Imports’ tab. Under ‘Check email from other accounts’, select ‘Add an email account’.
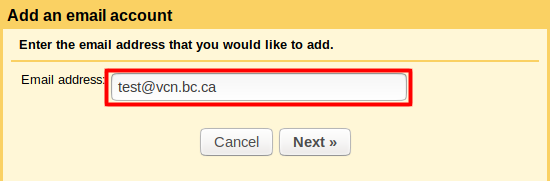
6. Enter your VCN email address. Click ‘Next’ to continue.
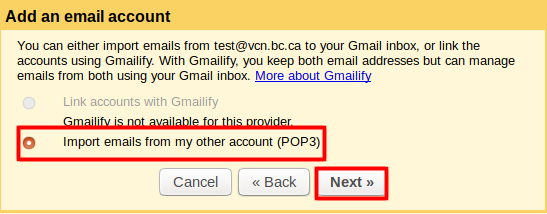
7. Select ‘Import emails from my other account (POP3). Click ‘Next’ to continue.
8. Fill in your VCN password. Ensure the following options are selected:
POP Server: mail.vcn.bc.ca
Port: 995
Make sure the following options are checkmarked:
- Leave a copy of retrieved message on the server.
- Always use a secure connection (SSL) when retrieving mail.
- Label incoming messages
9. When finished, click ‘Add Account’

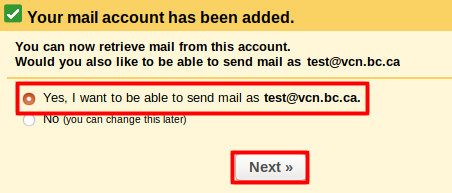
10. Select ‘Yes, I want to be able to send mail as [email protected]’. Click ‘Next’ to continue.
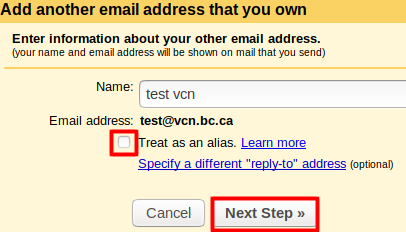
11. Uncheck ‘Treat as an alias’ if you want to be able to send email using your VCN email address. Otherwise, all mail will be sent using your Gmail address. Click ‘Next Step’ to continue.
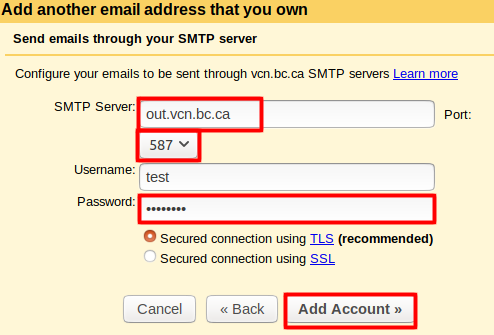
12. Fill out the following options:
- SMTP Server: out.vcn.bc.ca
- Port: 587
- Username: your VCN username
- Password: your VCN password
- Select ‘Secured connection using TSL’
13. Click ‘Add Account’ to continue
14. A confirmation email will now be sent to your VCN email. Navigate to your VCN inbox and click on the link provided in the confirmation email to finish setup.

15. Gmail will start fetching your VCN emails. This process may take a while depending on the current number of emails and inbox size of your VCN webmail.