
1. Find the Settings icon
2. Under the ‘General’ tab, look for ‘Accounts’
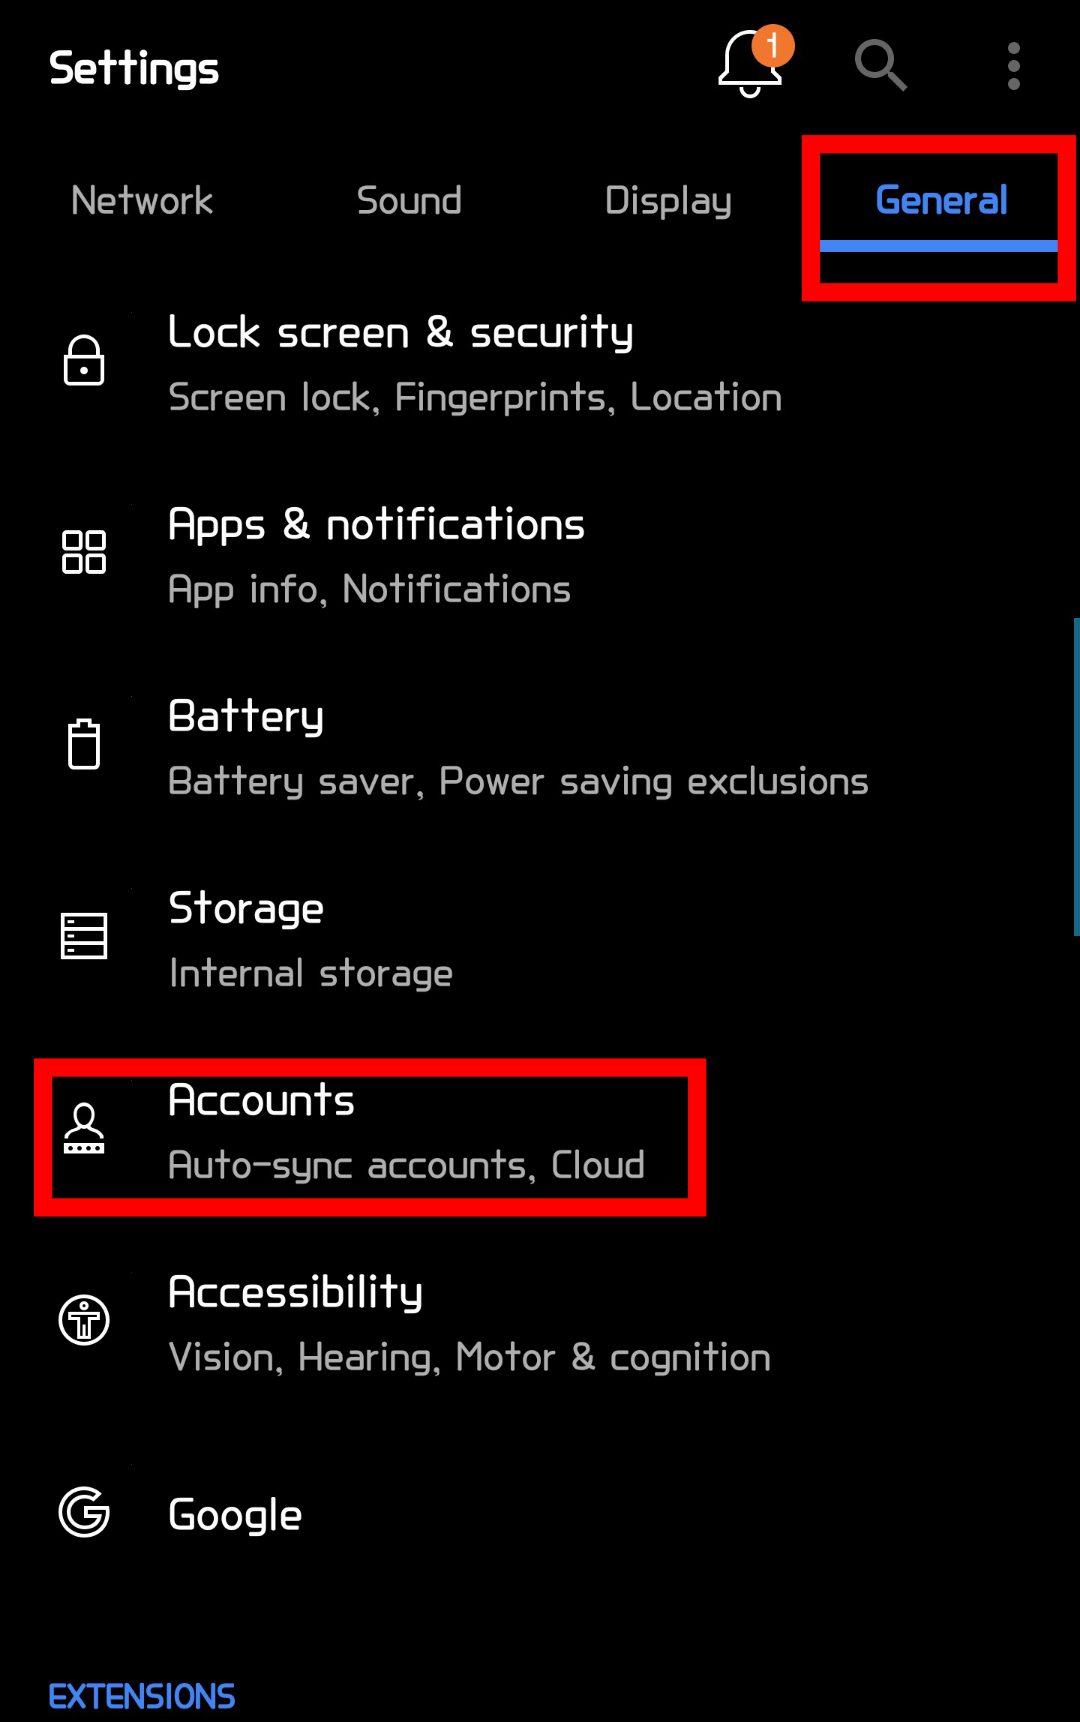
3. Click on ‘Add account’

4. Select ‘E-mail’

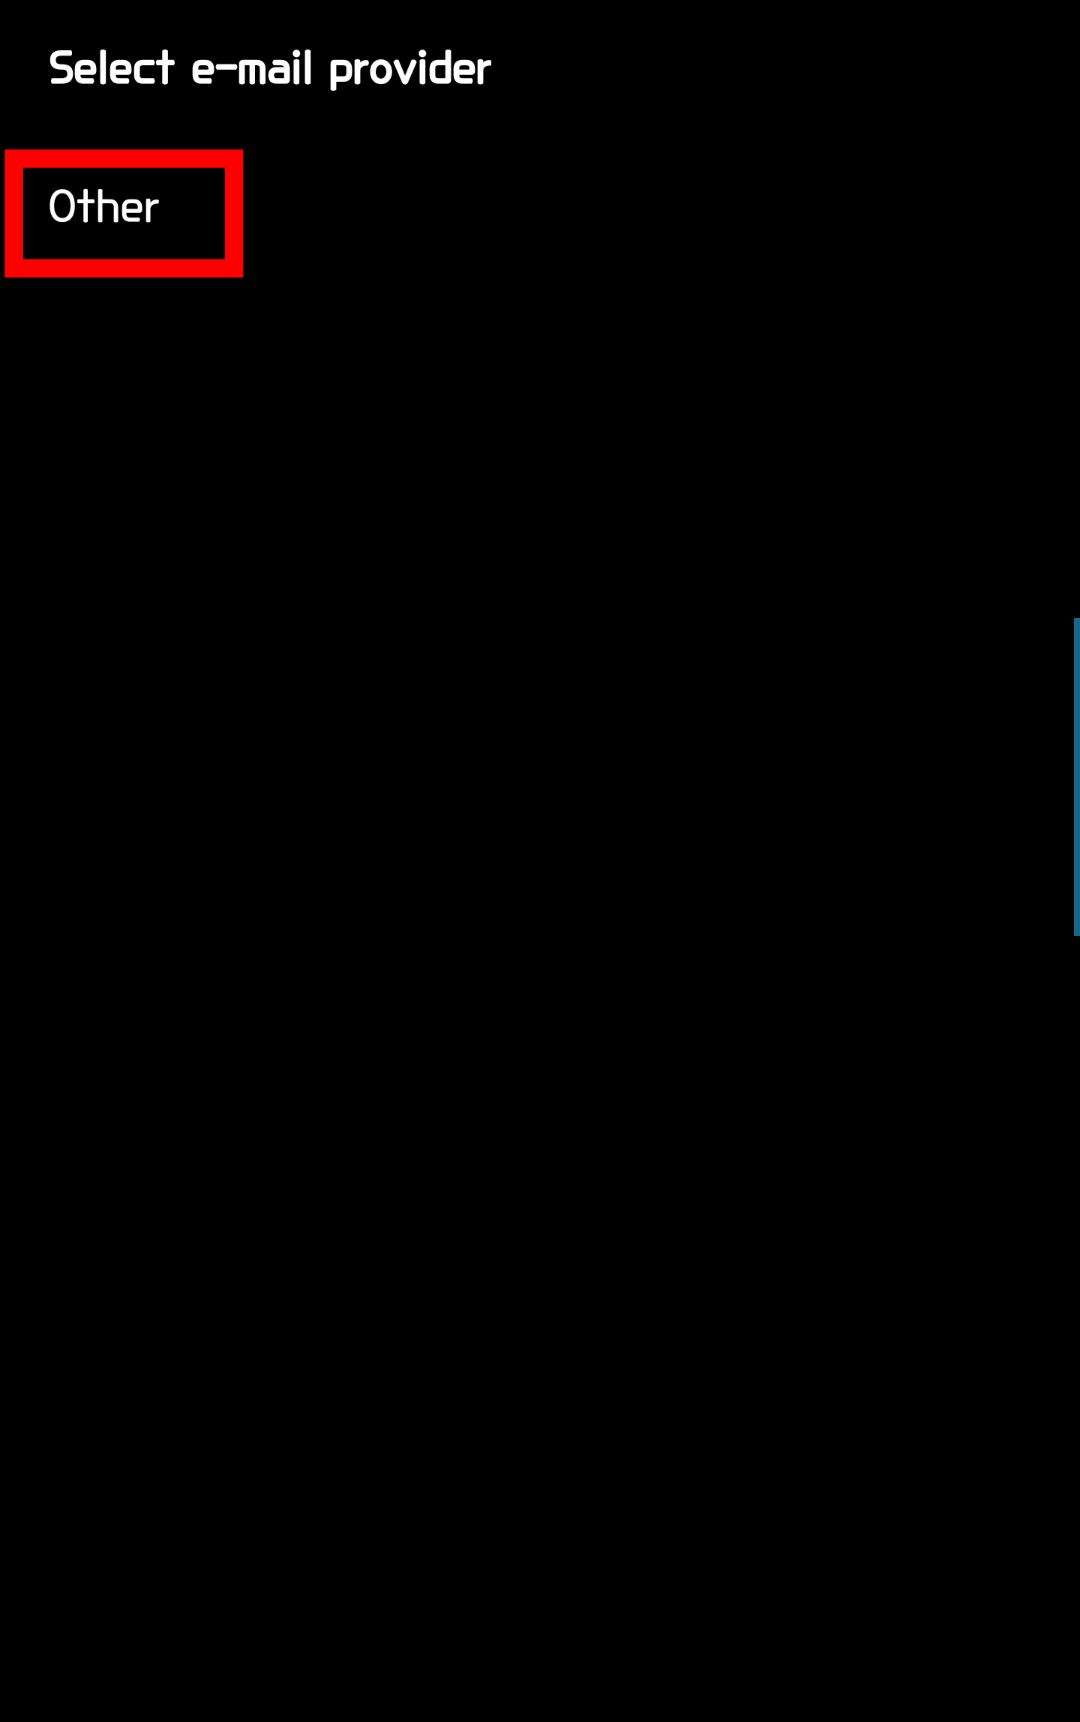
5. Under ‘Select e-mail provider’ click on ‘Other’
6. Enter your VCN email address and password

7. Under ‘Select account type’ click on POP3. Afterwards click ‘Next’

8. Input the following for ‘Incoming Server Settings’
-
- POP3 Server: mail.vcn.bc.ca
- Security Type: TLS
- Port Number: 110
- Delete from Server: Never
- Username: your vcn username
- Password: your vcn password
9. When finished, click ‘Next’

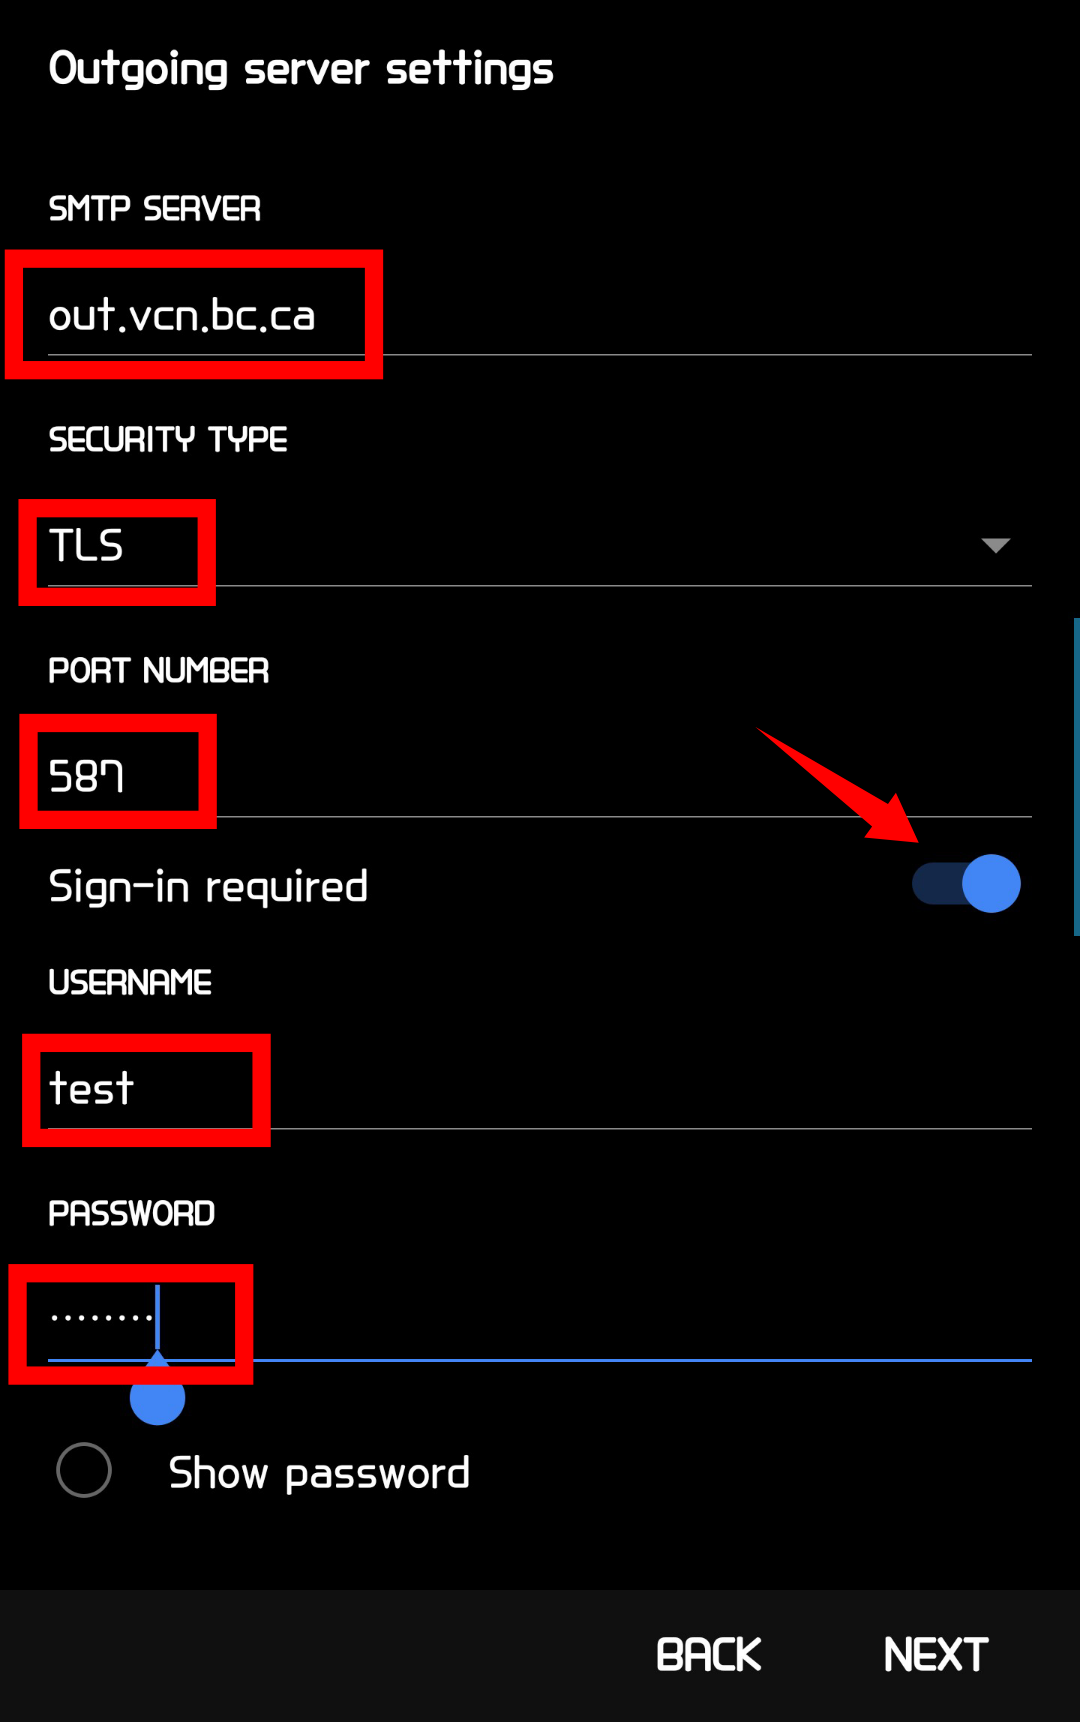
10. Input the following for ‘Outgoing Server Settings’
NOTE: If you wish to use Telus or Shaw as your internet provider, please go to your provider’s website and follow their Outgoing Server settings.
-
- SMTP Server: out.vcn.bc.ca (Using the Outgoing Mail Server ‘out.vcn.bc.ca’ first requires registering for access HERE)
- Security Type: TLS
- Port Number: 587
- Sign-in required: Enabled
- Username: your vcn username
- Password: your vcn password
11. Click ‘Next’ to continue
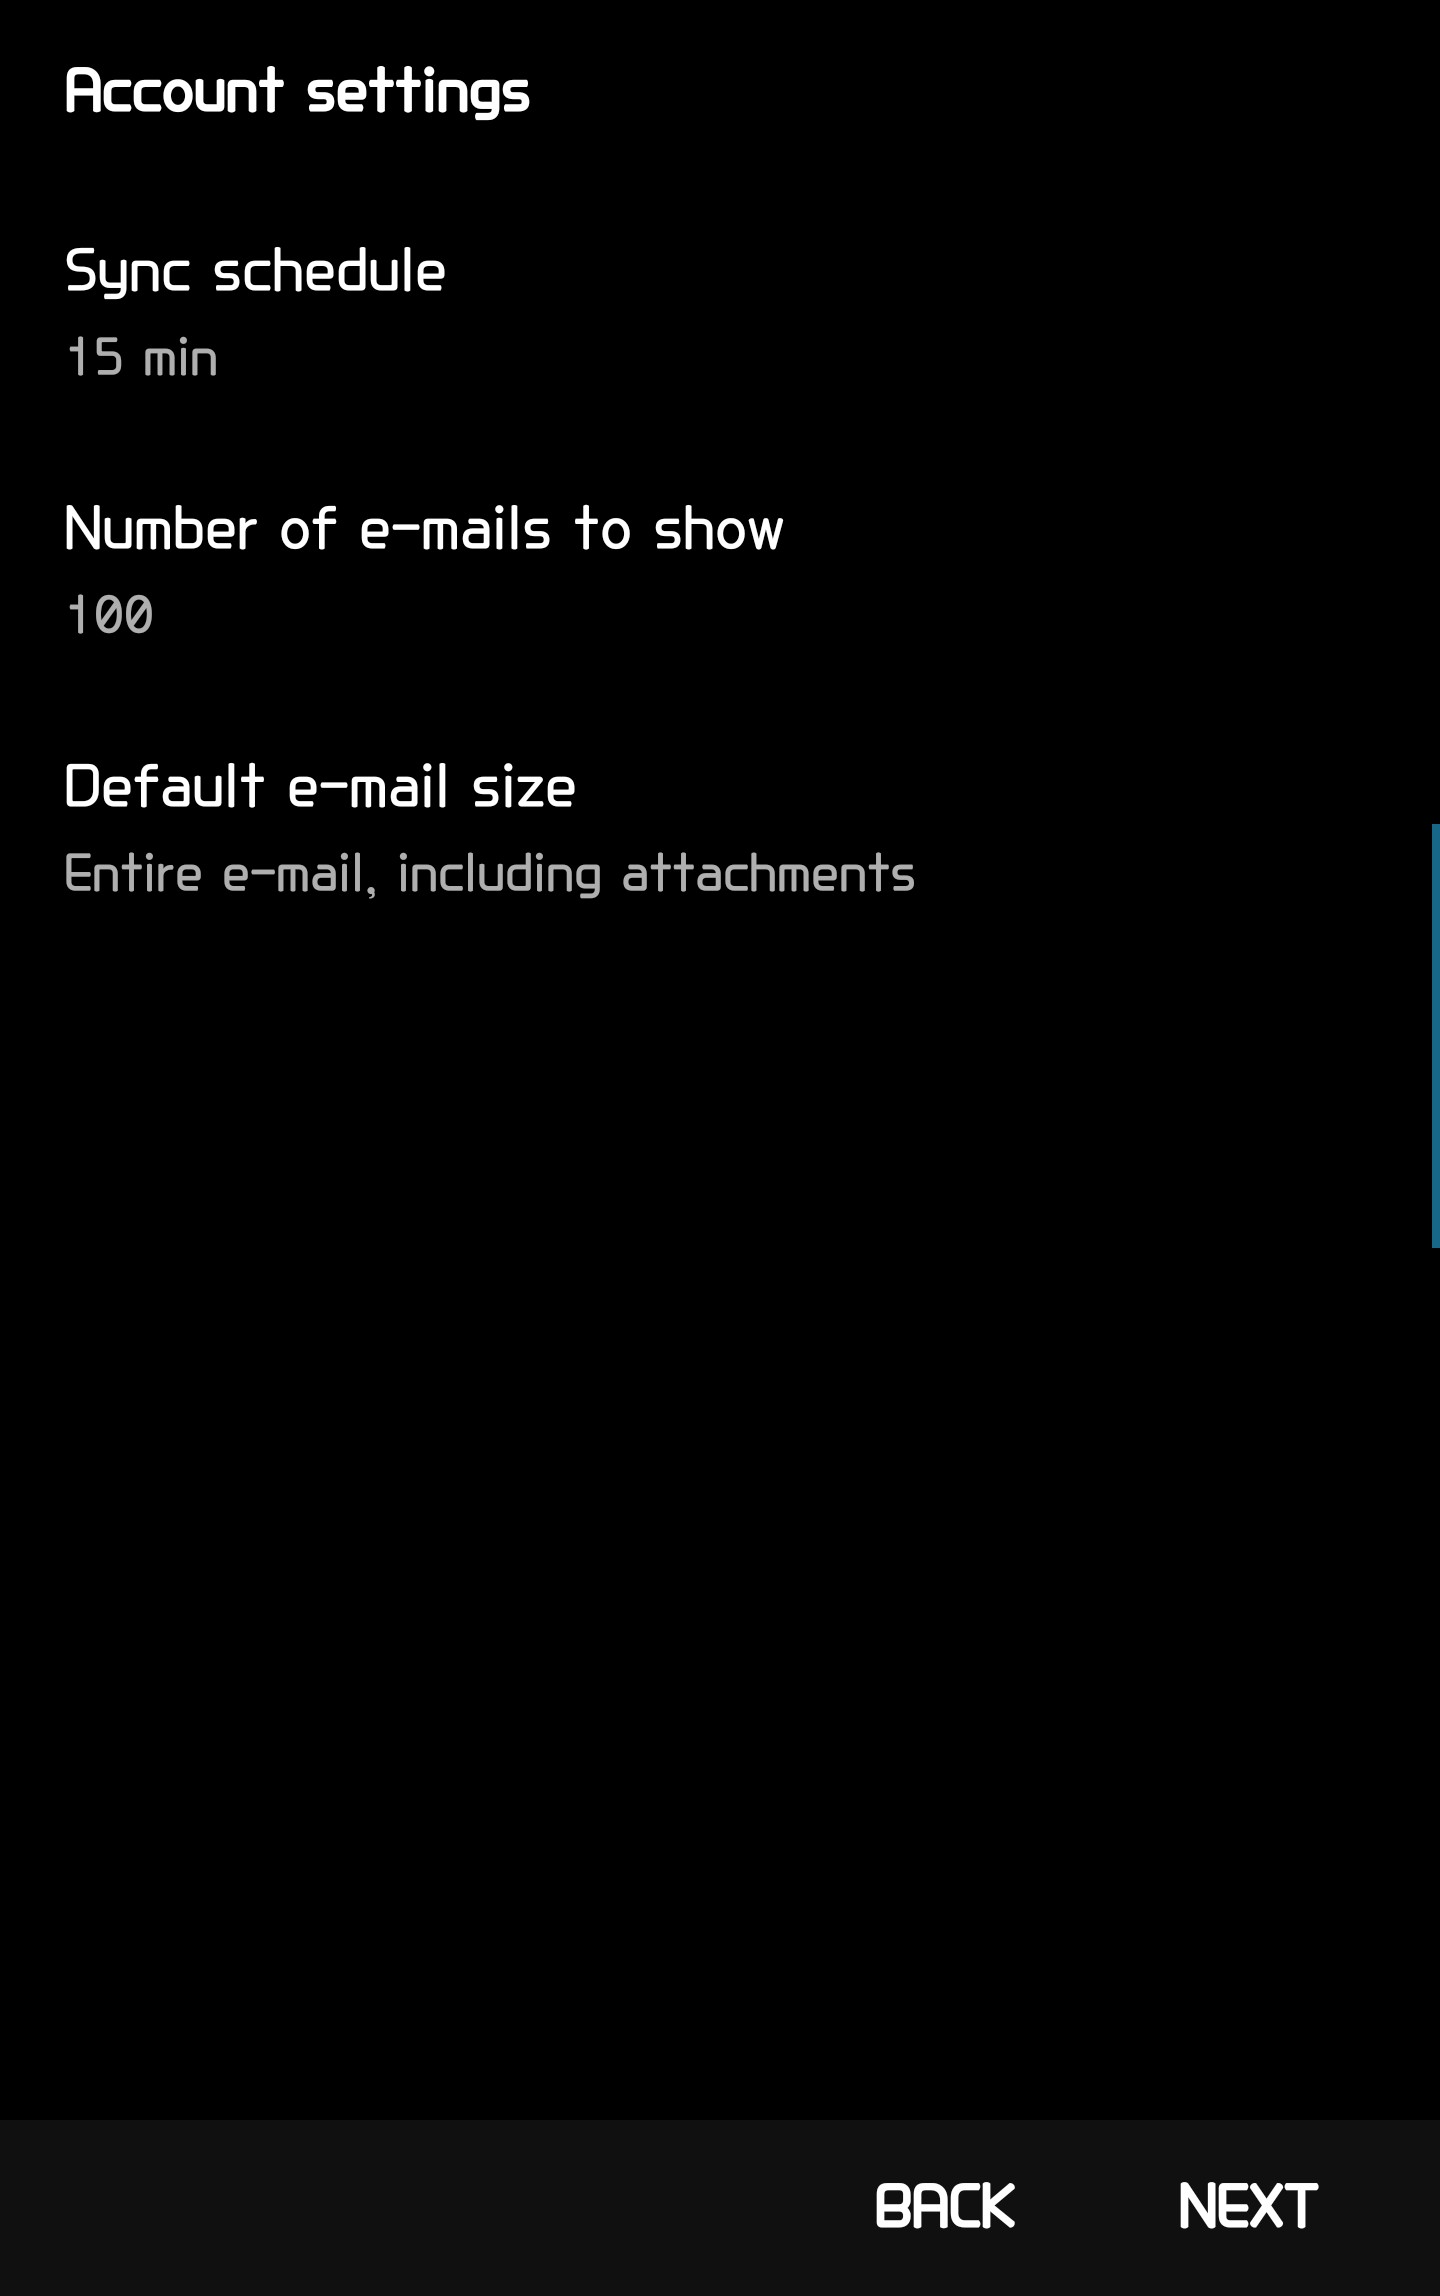
12. Change ‘Account settings’ options to own preferences. Click ‘Next’
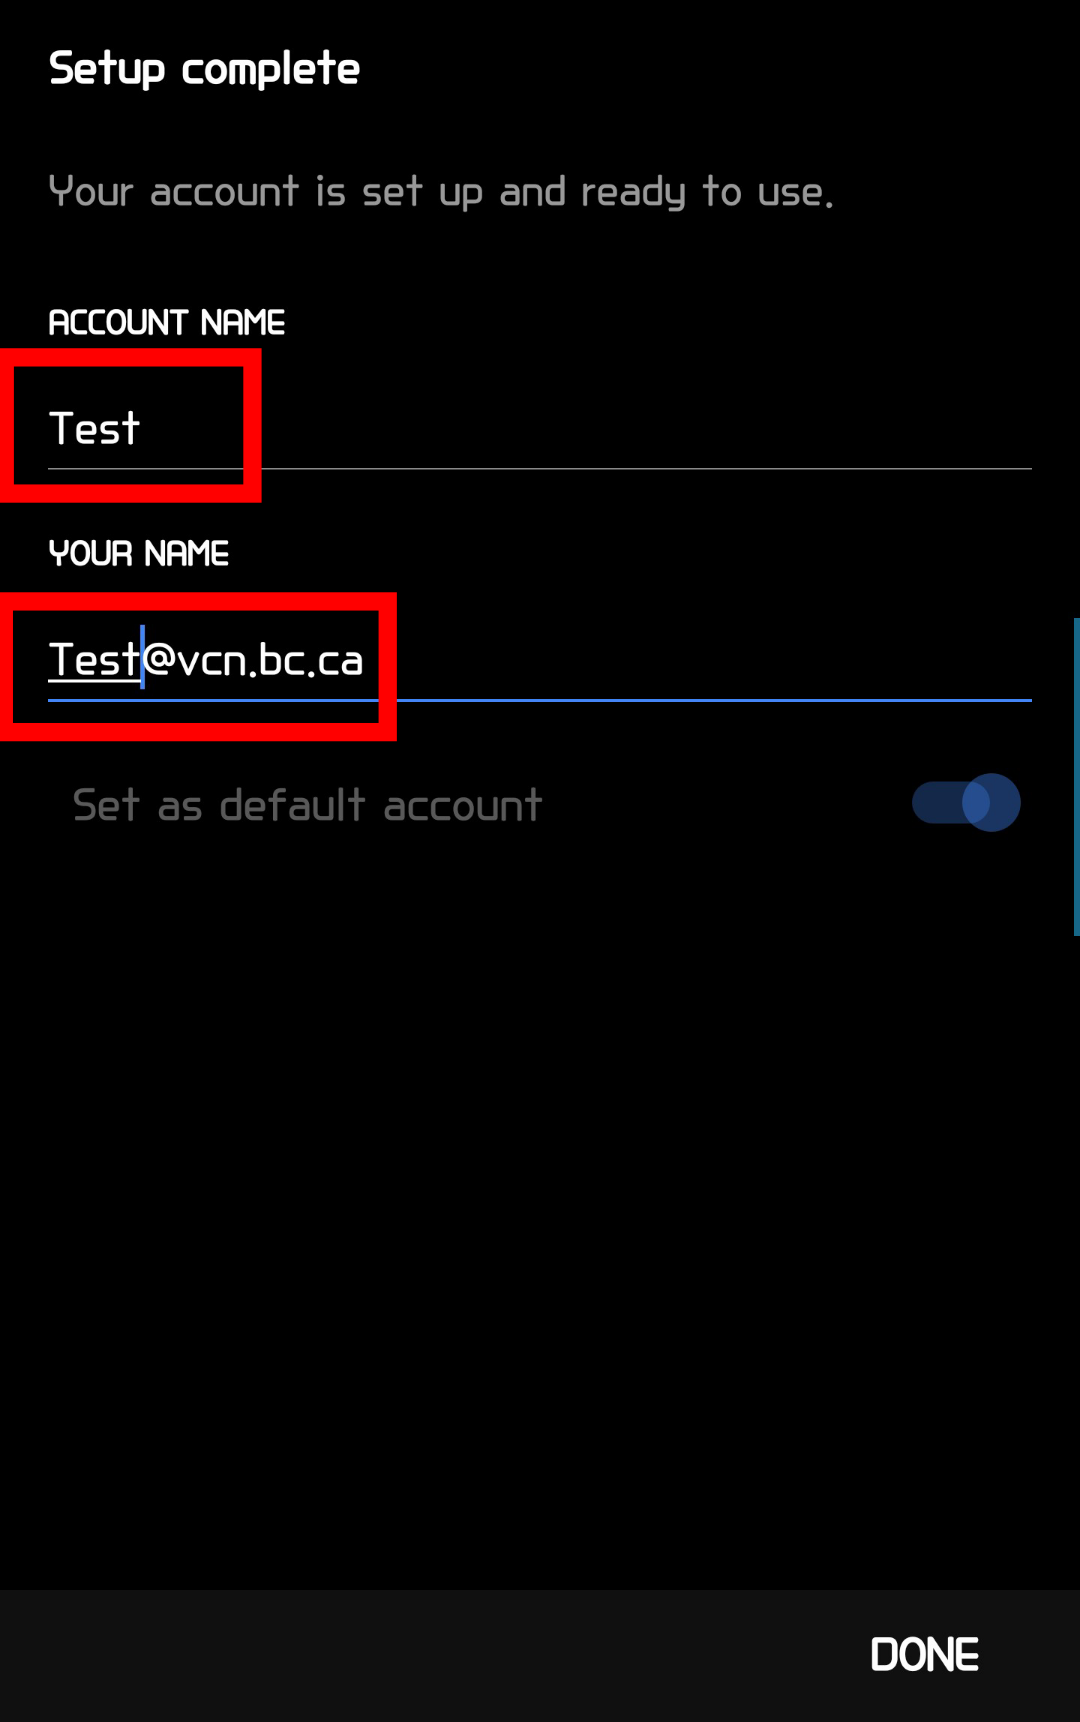
13. Once setup is complete, name your account and click ‘Done’
14. Your inbox will populate