(A downloadable and printable version of this document, in Microsoft Word 97 format, is available here.)
These instructions are based on The Quiz and Survey Master plug-in Version 4.7.10 by Frank Corso running under WordPress 4.7.1. This plug-in is recommended because it stores the data locally on the server and is easy to setup. Even so, there are a myriad of configuration options, for simplicity most options will be left in their defaults settings. Question choice and related settings are for example only. They do not reflect any particular VCN style or survey guideline.
Basic knowledge of the WordPress dashboard is assumed. You will need to create a new page to insert the shortcode for the survey itself to be displayed. Full documentation for The Quiz and Survey Master plug-in is available at: https://quizandsurveymaster.com/documentation
1) Once you are logged in the WordPress, click on “Quizzes/Surveys” in the left column of the WordPress dashboard. This will display a table of all previously created surveys and quizzes. Click the “Add New” button at the top of the screen and fill in the name for the survey. This can be changed later if you wish.
In the Name column “Edit” link
2) This will add the new survey to the table as well as display short codes used to both embeding the survey on the webpage and displaying the results. Write down or copy the short code under the “Shortcode” column. If this is the initial survey the code will be [mlw_quizmaster quiz=1].
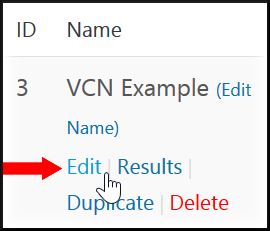
3) In the Name column, under the newly created survey, click the “Edit” link.
Setting up the questions.

This will display the quiz settings section, consisting of 10 tabs, the “Questions” tab will be preselected. Scroll down if necessary to see The “Add a New Question” area which is is broken up into three pieces:
- Question Type (drop-down menu) – The type of question we want to ask you is chosen.
- The “Question And Answers” editor – Write the question to be displayed in the survey.
- Question Options – The various settings for each question are made. (These will be left at their default settings.)
We will set up four different types of example questions: Multiple Response, Multiple Choice, “Large Open Answer“, and Number.
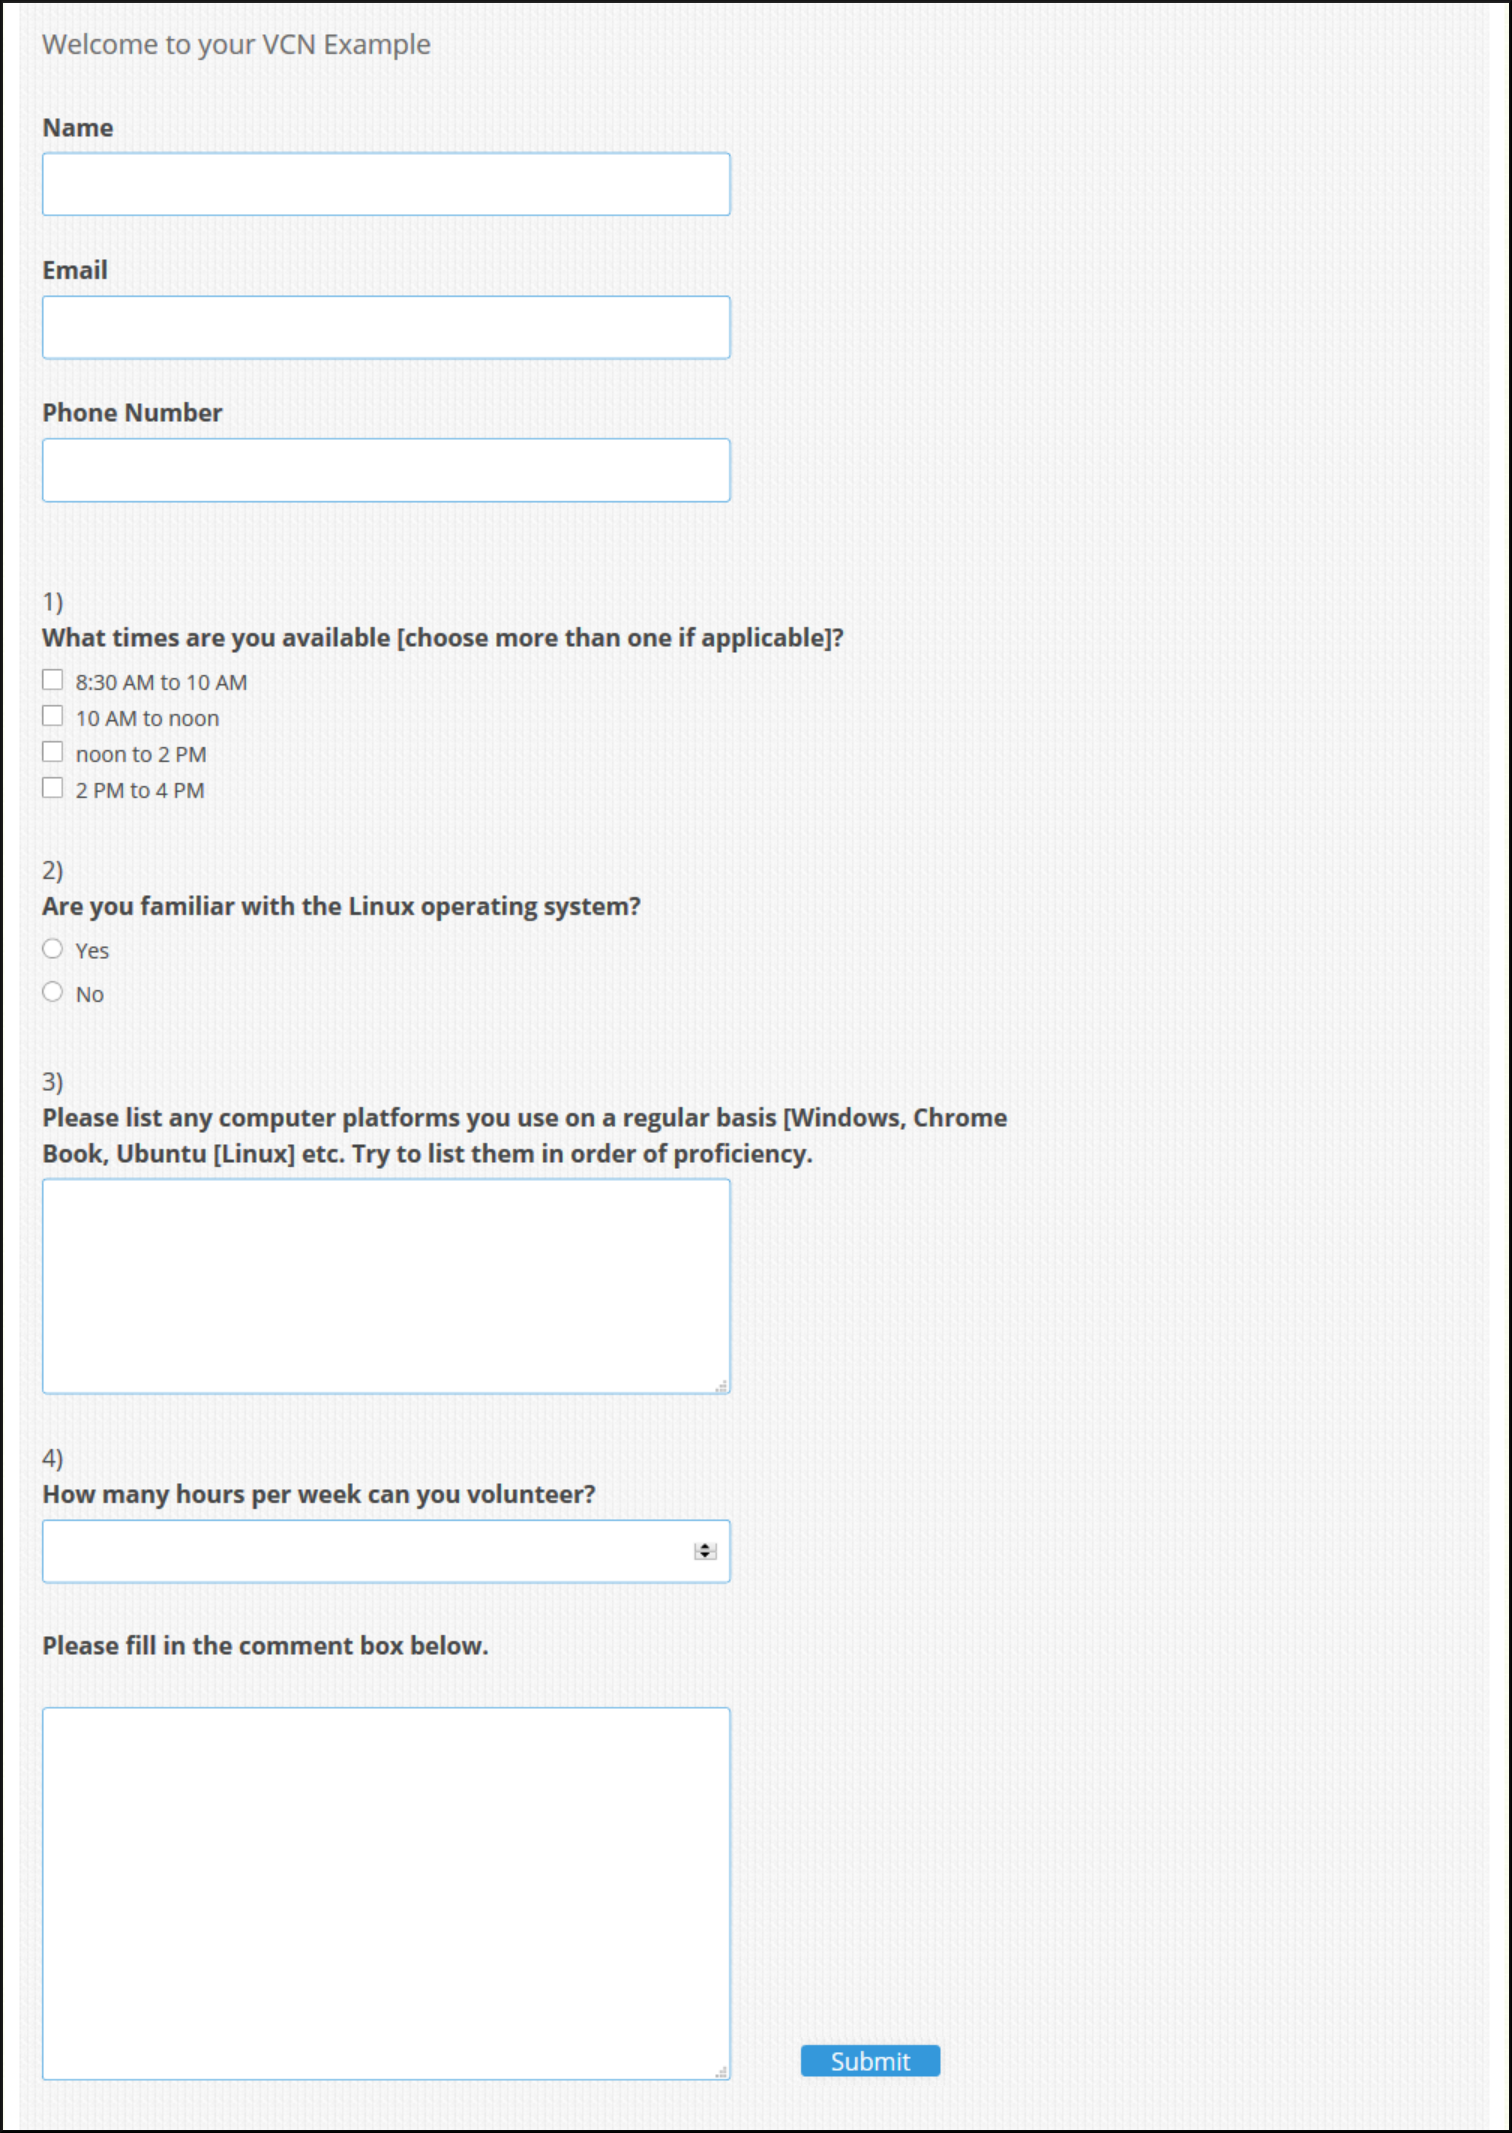
4) Creating the Multiple Response question: From the question type drop-down select “Multiple Response”. Below in the text editor, add your question. [All WordPress editor functions are available.] An example question might be, “What times are you available [choose more than one if applicable]?”
4.1 Scroll down to the bottom of the editor and click the “Add New Answer” button. Fill in the box with one of the potential answers, for example: “8:30 AM to 10 AM”. Leave the “Points Worth” value at zero and the “Correct Answer” tick box unchecked. Since this is a “Multiple Response” question, click the “Add a new answer” button and enter the next answer option, for example: “10 AM to noon”.
4.2 Continue adding answer options and so you are satisfied and then click the “Save Question” button. This completes a single question and answer pair of the survey and it will appear in a table of survey questions.
5) Creating the Multiple Choice question: Next we will set up the multiple choice question, which only allows one answer to be chosen out of the series of possible answers. From the question type drop-down select “Multiple Choice”. Again, below in the text editor add your question. Example: “Are you familiar with the Linux operating system?”
5.1 Scroll down to the bottom of the editor and click the “Add New Answer” button. Fill in the box with one of the potential answers, for example: “Yes”. Leave the “Points Worth” value at zero and the “Correct Answer” tick box unchecked.
5.2 Continue adding answer options and so you are satisfied and then click the “Save Question” button. The information will then be added to the table of questions.
6) Creating the Large Open Answer question: Next set up a “Large Open Answer” question type. This allows the user to freely enter text into a multiple line text box. From the question type drop-down select “Large Open Answer”. In the editor, enter the question or statement. For example: “Please list any computer platforms you use on a regular basis [Windows, Chrome Book, Ubuntu [Linux] etc. Try to list them in order of proficiency.”
6.1 Since the user may enter whatever text they want there is no reason to add an answer. Scroll directly down to the bottom of the screen and save the question.
7) Creating the Numeric question: To add a survey question were only a numeric value is allowed, from the question type drop-down select “Number”, and enter the question text in the editor. For example: “How many hours per week can you volunteer?”
7.1 Since the user may enter whatever numeric value they want there is no reason to add an answer. Scroll directly down to the bottom of the screen and save the question.
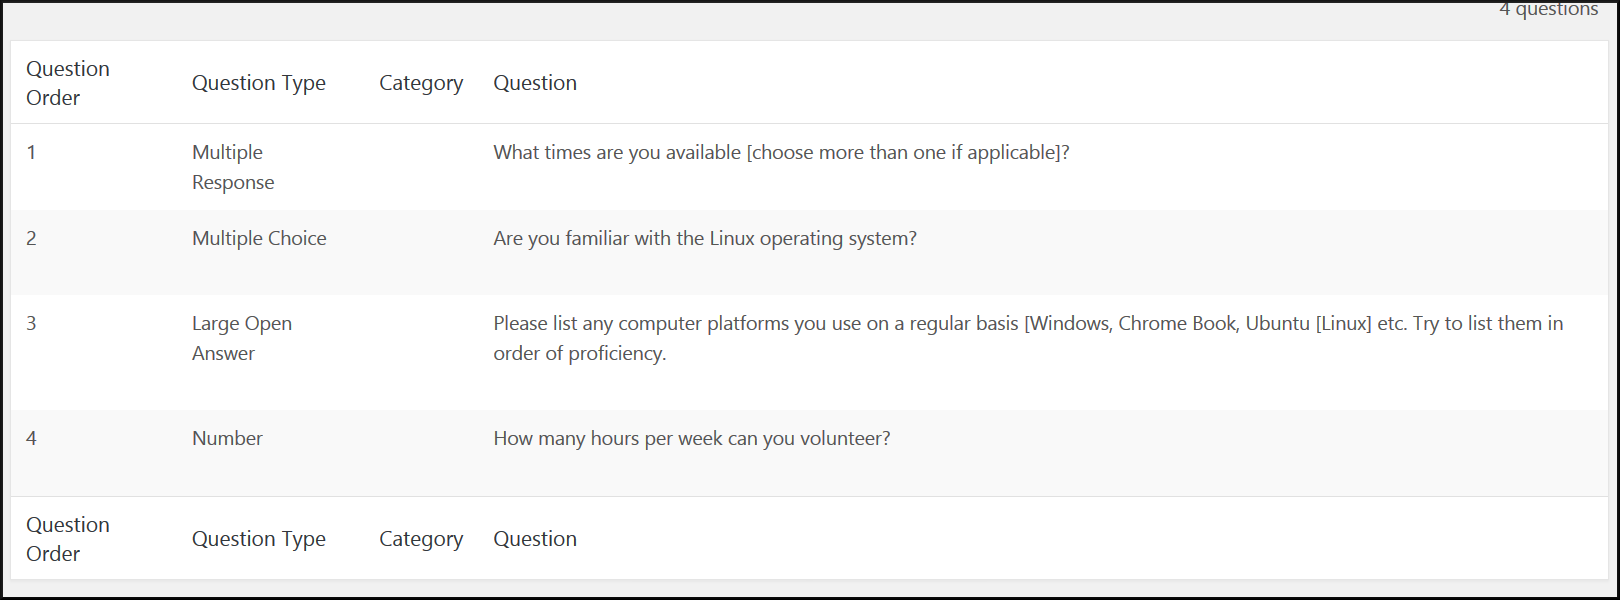
The table of saved survey questions should now look similar to this:
Settings survey options:
Click the “Options” tab along the top.

Set the answers to the questions as follows: (Please leave all other questions in their default positions unless you require further customization.)
- “Which system is this quiz graded on?” : Not Graded
- “Would you like to ask for the contact information at the beginning or at the end of the quiz?”: Beginning
- “Should we ask for users name?”: Yes
- “Should we ask for users business?” : No
- “Should we ask for users email?” : Yes
- “Should we ask for users phone number?” : Yes
- “Show question number on quiz? : Yes
Scroll down to the bottom of the screen and click the “Save Options” Button.
9) Create a new page in WordPress and paste in the shortcode for the survey If this is the initial survey the code will be [mlw_quizmaster quiz=1]. If you’re unsure about the code, click on “Quizzes/Surveys” in the left column of the work press dashboard. This will display a table of all previously created surveys and quizzes.
Viewing the Results:
- The individual survey results may be viewed from dashboard by clicking on “Quizzes/Surveys” in the left-hand column and then clicking on “Results”.
- After the user clicks the submit button a new page will be displayed showing the data entered.
Additional add on premium features may be purchased to enhance the results output, including exporting the data to CSV files.
This is the end of the instructions. Here is a screenshot of the example survey using the above settings and questions.